
When it comes to expanding fiber optic networks, especially in rural areas or along existing utility corridors, getting the cable from point A to point B quickly and cost-effectively is a major challenge. Trenching is expensive and disruptive. Pole attachments can be complex. That’s where lashed aerial cable comes in.
For decades, telephone and cable TV companies have used lashing to secure copper cables. Today, the same proven method is widely used for fiber aerial cable installations. But what exactly is cable lashing, and how do you do it properly? This guide covers everything you need to know about lashed aerial fiber installations.
Table of Contents
- What is Cable Lashing?
- Why Lash an Aerial Fiber Cable?
- Installation Steps
- Advantages Over Other Aerial Methods
- Conclusion
What is Cable Lashing?
Cable lashing is the process of securing a cable (in this case, a fiber optic cable) to a supporting messenger wire using a smaller-gauge wire wrapped tightly around both. The messenger wire—typically made of stranded steel—is first strung between poles or structures. Then, the fiber cable is placed alongside it, and a lashing wire (stainless steel or galvanized) is wound around both to hold the fiber firmly in place.
Think of it like tying a package with a string, but done automatically over long spans. A lashing machine—either manual or powered—rides along the messenger wire, spinning the lashing wire around the messenger and the fiber cable as it moves.
Important distinction: Lashing is not the same as ADSS (All-Dielectric Self-Supporting) cable. ADSS cable is designed to be hung directly between poles without a messenger. Lashing requires a separate messenger strand.
Why Lash an Aerial Fiber Cable?
Network operators choose lashed aerial construction for several compelling reasons:
Lower cost than underground: No trenching, no boring, no road cuts. You simply use existing poles (with proper attachment agreements).
Faster deployment: A skilled crew can lay several kilometers of fiber in a single day.
Easy upgrades and repairs: Need to add a second or third fiber cable later? Just lash it alongside the existing one. No need to re-string the messenger.
Flexibility: You can easily add slack loops at poles, transition to underground, or drop service to a building.
Proven reliability: When done correctly, lashed cables withstand wind, ice, and temperature changes very well.
Installation Steps
Before starting a fiber aerial cable installation using lashing, make sure you have these components ready:
| Component | Description |
| Messenger wire | 1/4″ or 3/8″ stranded steel wire (copper-clad steel is also available). Provides the tensile strength. |
| Fiber aerial cable | Typically a loose-tube, dry water-blocked or gel-filled cable rated for aerial use. Must be lightweight and flexible. |
| Lashing wire | Stainless steel or galvanized steel wire, usually 0.045″–0.065″ diameter. |
| Lashing machine | Manual (e.g., GMP Tools) or automatic/battery-powered (e.g., PREFORMED TELECRIMP™). Traverses the messenger. |
| Pole hardware | Bolts, through-bolts, or clamping assemblies to attach messenger to poles. |
| Dead-ends & preforms | For terminating the messenger wire at poles and tensioning it properly. |
Here’s how a typical lashed aerial fiber installation works:
Step 1: Survey and Plan
Identify pole locations, span lengths, clearance from power lines, and attachment heights. Obtain pole attachment permits if required.
Step 2: String the Messenger Wire
Using a winch or pull rope, string the messenger wire from pole to pole. Attach it to each pole using dead-end clamps. Apply proper tension (typically 150–300 lbs, depending on span length and expected ice/wind load).
Step 3: Place the Fiber Cable Alongside the Messenger
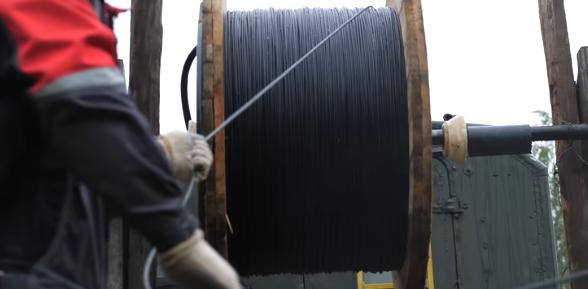
Lay the fiber aerial cable on the ground or on rollers along the path. Pull it up and position it next to the messenger wire, starting at one dead-end point.
Step 4: Start the Lashing Machine
At the starting pole, attach the lashing machine to the messenger wire. Insert the fiber cable into the machine’s guide so it sits parallel to the messenger. Tie off the lashing wire securely to the messenger.
Step 5: Lash the Span
Pull or power the lashing machine along the messenger to the next pole. The machine spins the lashing wire around both the messenger and the fiber cable at regular intervals (e.g., 3–6 inches between wraps). Ensure the lashing wire is tight but not cutting into the fiber jacket.

Step 6: Secure at the End Pole
At the far pole, cut the lashing wire and tie it off. Leave a service loop of fiber slack (a few meters) coiled near the pole for future splicing or maintenance.
Step 7: Repeat for Each Span
Detach the lashing machine, move to the next span, and repeat.
Advantages Over Other Aerial Methods
There are several ways to deploy aerial fiber optic cables, including ADSS (All-Dielectric Self-Supporting) cables and figure-8 self-supporting cables. However, lashed aerial cable systems still provide unique advantages.
| Installation Method | Main Support Method | Key Advantage | Limitation |
| Lashed Aerial Cable | Separate messenger wire | Flexible and scalable | Requires lashing process |
| ADSS Cable | Self-supporting dielectric design | No metal components | Higher cable cost |
| Figure-8 Cable | Integrated messenger | Faster deployment | Less flexible upgrades |
Conclusion
Lashed aerial cable remains a workhorse of the telecommunications industry. From fiber-to-the-home in rural communities to backbone expansion along railroad lines, the combination of a steel messenger and a lashing machine is hard to beat for speed, cost, and flexibility.
Understanding what is cable lashing and how to perform it correctly ensures your fiber aerial cable installation will be reliable, long-lasting, and easy to maintain. Whether you’re a network engineer, a contractor, or a utility owner, mastering lashing is a valuable skill in the world of outside plant fiber optics.
Get the Right Gear for Your Next Lashed Aerial Job
From lashing wire to fiber cable, we have everything you need for reliable aerial installation.
👉 [Shop Now] | [Talk to an Expert]


