
When working with fiber optic cables, whether for installation, troubleshooting, or maintenance, one essential skill you’ll need is knowing how to trace fiber optic cables. Fiber optic networks are the backbone of high-speed internet, communication systems, and data transfer. However, the small, delicate fibers can often be hidden underground, within walls, or in bundles of cables, making them challenging to trace manually. Thankfully, there are tools designed specifically for this purpose: fiber optic tracers, fiber tracers, and fiber cable tracers.
In this guide, we will explore what fiber optic cable tracers are, why they are essential, and how to use them effectively, with a special focus on how Baudcom’s products integrate fiber optic tracing functionality.

What is a Fiber Optic Cable Tracer?
A fiber optic tracer is a specialized tool used to detect the presence and trace the route of fiber optic cables. These tools are equipped with features that make it easy to identify fiber paths and locate cables even in complex or crowded environments. Fiber optic tracers are widely used by network technicians, installers, and maintenance professionals to ensure that fiber optic systems are set up correctly and to troubleshoot any issues that may arise.
Fiber tracers usually consist of a transmitter and a receiver. The transmitter is attached to one end of the fiber optic cable, and it sends a light signal through the fiber. The receiver detects the signal and allows the technician to trace the fiber’s path or identify breaks or faults along the cable.
Why Use a Fiber Tracer?
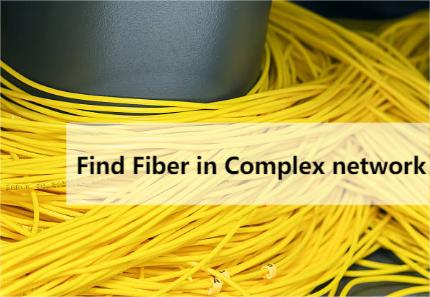
Tracing fiber optic cables can be challenging due to the high-speed data transfer and delicate nature of the fiber. Without the proper tools, you could waste time and risk damaging the cable. A fiber cable tracer simplifies this process and provides the following benefits:
Efficient Tracing: Fiber cable tracers can detect light signals within cables, making it faster and more efficient to locate cables in large or crowded areas.
Troubleshooting: If there’s an issue with a fiber optic network, a tracer can help pinpoint the location of breaks, faults, or bends in the cable that could be causing signal loss or data disruption.
Avoiding Damage: By using a fiber tracer, technicians can avoid unnecessary damage to cables when trying to locate and troubleshoot them.
Ease of Use: Most fiber optic tracers are user-friendly, offering simple, straightforward operation, even for technicians with minimal experience.
Types of Fiber Optic Tracers
There are several different types of fiber optic tracers available, each designed for different applications. Let’s take a look at the most common types:
VFLs are basic fiber optic tracers that emit a visible red light to identify fiber cables. These are ideal for detecting simple breaks, faults, or bends in the cable. The light illuminates the fiber at the point of damage, making it easy to locate the issue.

Fiber Optic Cable Tracer with Tone Generator
This type of tracer uses a tone generator to send a signal through the fiber optic cable, which can be picked up by a receiver. This is especially useful for tracing cables that are buried underground or hidden in hard-to-reach places.
OTDR (Optical Time Domain Reflectometer)
OTDRs are more advanced and provide detailed information about the fiber’s integrity, including the location of faults, the length of the fiber, and the amount of light loss. They are perfect for in-depth analysis of fiber optic networks.

How to Use a Fiber Optic Tracer
Using a fiber optic tracer effectively requires a few simple steps. Here’s a basic guide on how to trace fiber optic cables:
Step 1: Select the Right Fiber Tracer
When choosing between a Visual Fault Locator (VFL) and an Optical Time Domain Reflectometer (OTDR), the task’s complexity and scale should guide your decision.
Use a Visual Fault Locator (VFL) for quick, visual tasks:
identifying specific fibers in a patch panel, tracing cables over short distances ranging from a few meters to 30 kilometers., or locating severe bends or breaks where light visibly leaks. It’s your first-response tool for simple continuity checks and physical tracing.
In contrast, use an Optical Time Domain Reflectometer (OTDR) when you need precise measurements:
determining the exact distance to a fault, quantifying loss in decibels, certifying long-haul installations from several kilometers to hundreds of kilometers, or diagnosing “invisible” issues like poor splices or subtle bends.
The VFL tells you if there’s a problem you can see; the OTDR tells you exactly where and how bad the problem is.
VFL: “Is it broken, and which one is it?” (Short-range 0-30km, visual, simple).
OTDR: “Where exactly is it broken, and how bad is the damage?” (Long-range, quantitative, detailed).
Step 2: Connect the Tracer to the Cable
Depending on the tracer, you’ll either connect the transmitter to one end of the fiber or use a tone generator. Make sure to follow the manufacturer’s instructions for connection.
Step 3: Activate the Tracer
Turn on the fiber tracer. For VFLs, a visible red light will appear at the point of the break or fault. For tone generators, the receiver will detect the signal and help you trace the fiber’s path.
Step 4: Trace the Cable Path
Walk along the fiber’s route with the receiver or look for the visible signal from the VFL. If you’re using a tone generator, move along the fiber until you hear the signal loudest, which indicates you are near the point of interest.
Step 5: Identify Faults or Breaks
As you trace the cable, look for any changes in the signal strength or interruptions. In the case of faults or breaks, the fiber optic tracer will alert you to the location, allowing you to take corrective action.
Tips for Using a Fiber Tracer
Ensure Proper Calibration:
Before using your fiber tracer, make sure it’s properly calibrated to ensure accurate readings.
Test Different Types of Cables:
If you are working with different types of fiber cables, make sure your tracer is compatible with the cable type you are testing.
Handle with Care:
Fiber optic cables are delicate and can break or bend easily. Always handle cables gently to prevent any damage that might impact performance.
Use a Fiber Optic Cleaner:
Dust or dirt on the connectors can interfere with the performance of your tracer. Keep the fiber connectors clean using a fiber optic cleaner.
Conclusion
Tracing fiber optic cables doesn’t have to be a difficult task. With the right tools like a fiber optic tracer, fiber tracer, or fiber cable tracer, you can quickly locate cables, troubleshoot issues, and ensure the proper functioning of your fiber optic network. Tools like Baudcom’s Mini Optical Power Meter, Handheld Fiber Optic Tester, and OTDR offer built-in tracing functions. They make the process even easier and more efficient. Whether you’re installing new cables or maintaining an existing network, having a reliable fiber tracer in your toolkit is essential for any network technician or professional working with fiber optics.
Keep Learning
Fiber Optical Cable: The Ultimate Guide


